Moving Terraform State file to OCI Object Store
When developing with Terraform it is nice to keep everything local on your laptop. Makes for great ease of development; there are time when you want to share your environment, i.e. state file, with others in your development organization. In order to do this, the state file has to be moved to a common area. In many environments this would happen by moving the state file to an object store. Although many people talk about the other cloud platforms and how to do things; Oracle provides a pretty good platform for many items. The object store is only part of the it.
Build the Object Store
In order to build your object store, first you have to login to Oracle Cloud (cloud.oracle.com). Once logged in, you then need to go to hamburger menu in the upper left corner. Under Core Infrastructure, select Object Storage and Object Storage.

Once you arrive to the Object Storage page, you will be presented with a button that says Create Bucket. The bucket is where the state file will reside once it is provisioned there. Click Create Bucket.
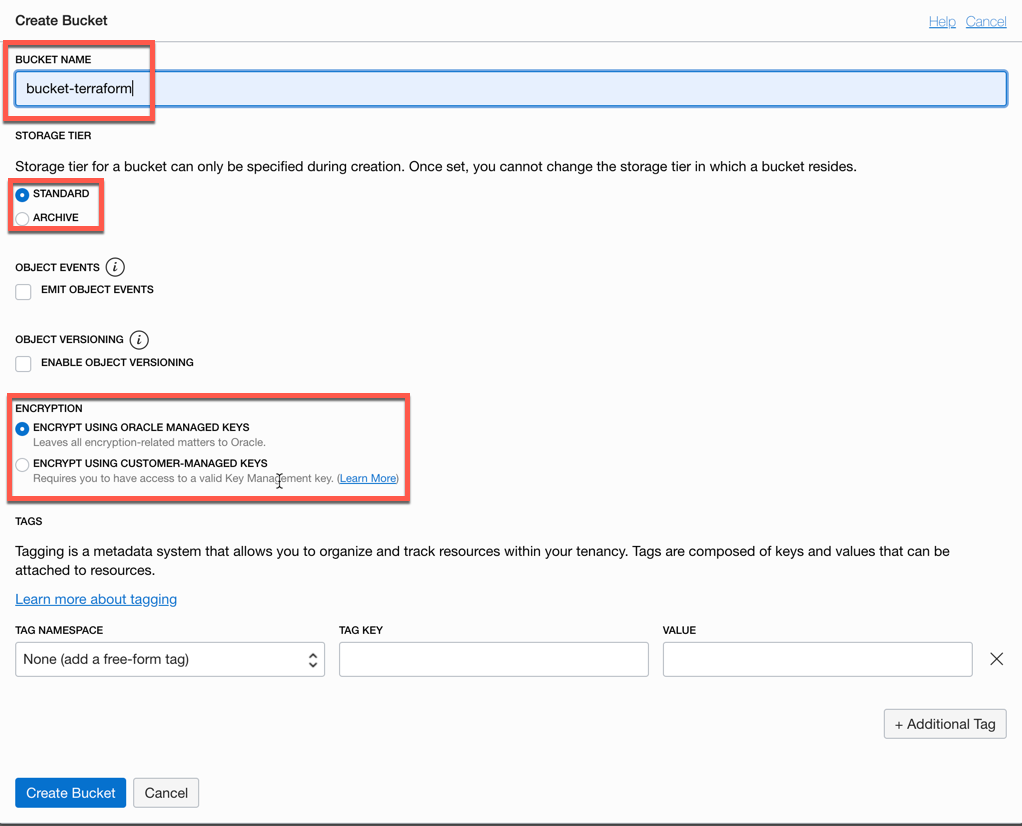
After clicking the Create Bucket button, you are presented with a dialog to build the bucket. In this dialog, provide the bucket name, what type of storage (Standard) to use and allow Oracle to maintain the encryption. After ensuring these times are done, then click the Create Bucket button at the bottom of the dialog.

At this point, the bucket you plan on using for Terraform State file has been created.
Pre-Authenticated Request
With the Object Storage bucket created the next thing that has to be done is define a Pre-Authenticated Request. Pre-Authenticated requests are used to allow access to the object storage bucket without having to login each time you want to move an item to the bucket. This also allows for commands and dynamic commands to access the object store, place and use files in the bucket.
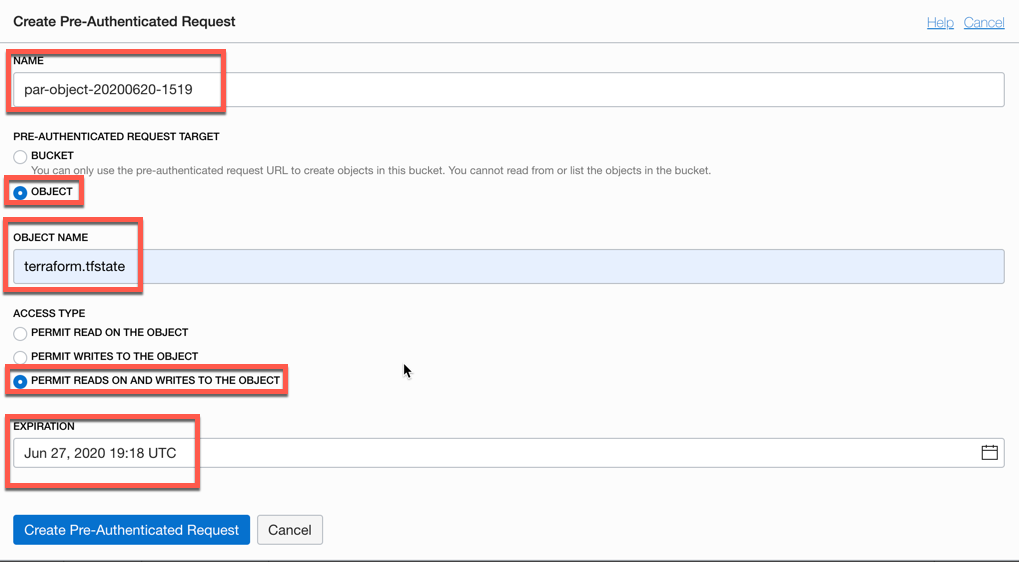
To create a Pre-Authenticated Request, click on the Create Pre-Authenticated Request button. This will bring up the Create Pre-Authenticated Request dialog. Within this dialog, provide a name, ensure the radio button for Object is selected, ensure that the object can be read/write, lastly set the expiration date. After all those items are set, click the Create Pre-Authenticated Request button.

Once the Pre-Authenticated Request has been created, you will be prompted to copy the corresponding URL. In our case, this URL looks similar to this:
https://objectstorage.us-ashburn-1.oraclecloud.com/p/Zi1rw_yl1……….4HjMwEU2zaaBmx71sas_oU/n/idtlingilfcy/b/bucket-terraform/o/terraform.tfstate
Configure Backend State
Now that we have the URL needed to make an HTTP request to the Object Storage, we can configure the backend in the main.tf file. The code block that needs to be established is as follows:
########################
# Backend
########################
terraform {
backend “http” {
address = “https://objectstorage.us-ashburn-1.oraclecloud.com/p/Zi1rw_yl1E9Z1q………zaaBmx71sas_oU/n/idtlingilfcy/b/bucket-terraform/o/terraform.tfstate”
update_method = “PUT”
}
}
As you can tell this is quite simple. We are simply telling terraform to use the HTTP protocol with the backend. Then providing the address for the backend and what method to use. In this case, we are using the cURL method of PUT to ensure changes to the state file are updated on the object store.
Initializing
In order for the state to be placed on the Object Storage that was just created, the terraform environment has to be initialized. This done by simply running terraform init.
Validating
After the initialization and/or an apply process, the state file can be validated by looking into the object storage and seeing if the file exists. In this example, the file was created and modified on 21 June 2020 @ 3:55 am UTC.

Summary
With the Terraform state file located in a cloud environment and in an object storage are it can be shared between members of a development staff and network operations departments. This makes it easy for everyone to keep track of what workloads have been created within a given cloud environment.
Enjoy!!!
Bobby Curtis

I’m Bobby Curtis and I’m just your normal average guy who has been working in the technology field for awhile (started when I was 18 with the US Army). The goal of this blog has changed a bit over the years. Initially, it was a general blog where I wrote thoughts down. Then it changed to focus on the Oracle Database, Oracle Enterprise Manager, and eventually Oracle GoldenGate.
If you want to follow me on a more timely manner, I can be followed on twitter at @dbasolved or on LinkedIn under “Bobby Curtis MBA”.
